HOW TO INSTALL WINDOWS 7 ULTIMATE
|
|||
|
Learn How To Install Windows 7 on computer desktop or laptop. This is step By step method for beginners with screenshots. You can easily install windows 7 by below steps.
Windows 7 was featured as an incremental upgrade to its predecessor, Windows Vista. It was designed to improve performance, hardware and software compatibility, and better user interface.
|
||
You need to have ISO Windows 7 bootable CD/DVD or USB drive to be able to install Windows 7.
Learn how to Create Bootable Media.
If you already have bootable CD/DVD or USB drive then you can skip this part.
Before we go to Windows 7 installation, first you need to change the first boot device of your computer BIOS to be able to boot your bootable CD/DVD or USB drive.
Learn how to Change First Boot Device.
Now that were done with creating bootable media and changing first boot device, we are now ready to Windows 7 installation.

Turn ON your computer and wait to black screen to show up. When you see the "Press any key to boot from CD or DVD..." simply press any key on your keyboard.
Note: If you dont press any key it will boot direct to your current OS. If this happens, simply reboot and try to boot to the CD or USB drive again.

Read: You don't need to do anything at this point but wait for Windows 7 to finishing loading files in preparation for the setup process.
Note: No changes are being made to your computer at this time. Windows 7 is just temporarily "loading files" into memory for the setup process.

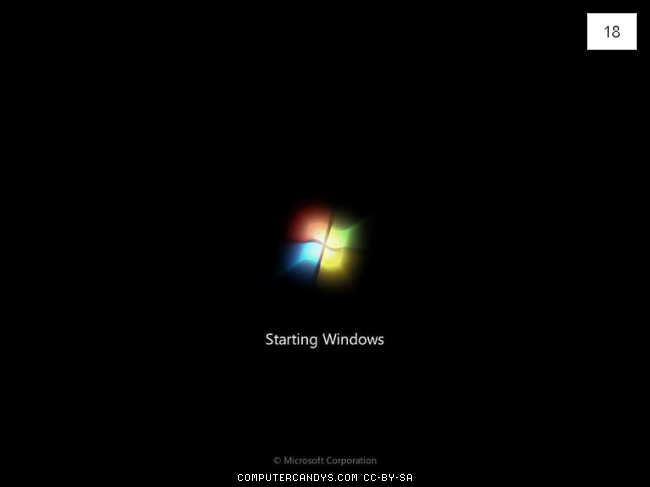
After the Windows 7 install files are loaded into memory, you will see the Windows 7 splash screen, indicating that the setup process is about to begin.

Choose the Language to install, Time and currency format, and Keyboard or input method that you'd like to use in your new Windows 7 installation.

Read: This will officially begin the Windows 7 clean install process.
Note: The Repair your computer link is used to start a Windows 7 Startup Repair or perform another recovery or repair task from System Recovery Options.

The Windows 7 setup process is now beginning. No need to press any keys here, everything is automatic.

Note: Read through the agreement, check the I accept the license terms checkbox under the agreement text, and then Click Next to confirm that you agree with the terms.
Important: You are not breaking any laws or contracts by reinstalling Windows 7 via this clean install. As long as this particular copy of Windows 7 is only being operated on one computer, you are OK.

Important: Even if you are upgrading from a previous operating system to Windows 7, I highly recommend that you do not follow the Upgrade installation. You'll get better performance with less chance of issues if you follow these clean install steps.

Important: If you have a new or otherwise empty hard drive and you were installing Windows 7, you will not see this! Skip this and go to Step 14 instead.
Note: Windows 7 setup considers partition management as an advanced task, so you'll need to Click the Drive options (advanced) link to make those options available.

Now that all available drive options are listed, you can delete any operating system related partitions from your existing hard drives. Highlight the partition you want to delete and then Click the Delete link.

Warning: This will remove all of the information on that partition. Everything on that drive will be deleted during this process.

Note: If there are any other partitions that need to be deleted, you can do so at this time. Highlight the partition and Click the Delete link.
Note: As you can see, the partition we deleted in the last step is gone. It may appear like it's still there but if you look closely, you'll see that that same 29.9 GB space is now described as Unallocated Space, not as a partition.

Warning: This will remove all of the information on that partition. Everything on that drive will be deleted during this process.

Read: As you can now see, all the space on the installed hard drive is unallocated. No partitions exist on this computer. Now Choose the appropriate unallocated space to install Windows 7 on and then Click Next.
Note: You do not need to manually create a new partition nor are you required to manually format a new partition. Windows 7 Setup will do this automatically.

Read: Windows 7 will now begin installing. No user intervention is necessary. Everything is automatic.
Note: Depending on the speed of your computer, this process could take anywhere from 5 to 30 minutes.

Note: When your computer restarts, Setup will continue.

Do not press any key on your keyboard! This time you will just let the computer boot up to continue by doing nothing.
Please wait while Windows 7 is loading. This usually only takes a minutes.

Note: This starting of services will occur during every Windows 7 boot as well but you won't see it like this again. Services start in the background during a normal Windows 7 startup.

Read: This last Windows 7 Setup screen says "Completing installation" and may take several minutes. All you need to do is wait, everything is automatic.

Note: Your PC will automatically restart again.
Important: Do not restart your computer manually at this point. Windows 7 Setup will restart your PC for you. If you interrupt the setup process by restarting manually, the clean install process may fail. You may then need to start the Windows 7 setup over again from the beginning.

Do not press any key on your keyboard! And again just let the computer boot up to continue by doing nothing.

Please wait while Windows 7 is loading. This usually only takes a minutes.

Windows 7 is now loading drivers, checking to make sure everything has been setup properly, removing temporary files, checks video performance and etc.

Windows 7 needs to know what user name you'd like to use and how you'd like your computer to be identified on your local network.

Microsoft recommends that you choose a password that will be required when starting Windows 7 before access to your user account will be allowed.
In the Type a password: text box, Enter a complicated but easy-for-you-to-remember password. Retype the same password in the Retype your password: text box.
In the Type a password hint: text box, Enter a hint related to your password to you to remember. This hint will display if you Enter the wrong password when logging on to Windows 7.
Tips: You can write your password in a piece of paper so when you forgot your password you can still be able to remember it from a piece of paper.
Note: Planning on having more than one user on your computer? Don't worry - you can set up more users inside Windows 7 later.
 27 • Enter the Windows 7 product key then Click Next.
Enter the product key that came with your retail purchase or legal download of Windows 7. If Windows 7 came as part of your complete computer system, Enter the product key you were given as part of that purchase.
Note: If Windows originally came preinstalled on your computer, your product key is probably located on a sticker attached to the side, back, or bottom of your computer's case.
Important: You may be able to avoid Entering a product key at this point but you will eventually need to do so in order to continue using Windows 7. I highly advise that you Enter your product key here and choose to Automatically activate Windows when I'm online.
 28 • Choose a Windows Update Option.
You are more than welcome to choose Use recommended settings but I do not recommend that you choose Ask me later.
I recommend that you choose Install important updates only. This option is the safest because it restricts Windows 7 from doing anything with your data or to your computer automatically except when important security and stability updates are available.
Note: These settings can easily be changed within Windows 7 after you are done stepping through these configuration questions.
 29 • Choose the Correct Time Zone, Date and Time then Click Next.
On the Review your time and date settings screen, choose the correct Time zone, Date, and Time.
Note: If the time and date of Daylight Saving Time changes, Microsoft will issue an update via Windows Update to change the automatic time change, so don't avoid checking this box assuming that Daylight Saving Time changes won't occur correctly.
 30 • Choose a Network Location.
Choose Home network or Work network if that applies to you. Most of you reading this will choose Home network.
Choose Public network if you use a mobile computer and you connect to the internet or other computers away from home. Also, be sure to choose Public network if you access the internet via a mobile broadband network.
 31 • Wait for Windows 7 to Connect to the Network.
Windows 7 is now connecting your computer to the network. You don't need to do anything here. Everything is automatic.
Note: If Windows 7 detects another computer on your network running Windows 7 that also has a homegroup setup, you will be prompted to choose what kinds of files you'd like to share on that homegroup and for the homegroup password. You can Enter this information or Skip the setup entirely.
 32 • Wait for Windows 7 to Prepare the Desktop.
Please wait while Windows 7 is loading. Soon you will be able to see your windows desktop.
 33 • Windows 7 Clean Installation is Complete!
Congratulations! You successfully installed Windows 7.

Enter the product key that came with your retail purchase or legal download of Windows 7. If Windows 7 came as part of your complete computer system, Enter the product key you were given as part of that purchase.
Note: If Windows originally came preinstalled on your computer, your product key is probably located on a sticker attached to the side, back, or bottom of your computer's case.
Important: You may be able to avoid Entering a product key at this point but you will eventually need to do so in order to continue using Windows 7. I highly advise that you Enter your product key here and choose to Automatically activate Windows when I'm online.

You are more than welcome to choose Use recommended settings but I do not recommend that you choose Ask me later.
I recommend that you choose Install important updates only. This option is the safest because it restricts Windows 7 from doing anything with your data or to your computer automatically except when important security and stability updates are available.
Note: These settings can easily be changed within Windows 7 after you are done stepping through these configuration questions.

On the Review your time and date settings screen, choose the correct Time zone, Date, and Time.
Note: If the time and date of Daylight Saving Time changes, Microsoft will issue an update via Windows Update to change the automatic time change, so don't avoid checking this box assuming that Daylight Saving Time changes won't occur correctly.

Choose Home network or Work network if that applies to you. Most of you reading this will choose Home network.
Choose Public network if you use a mobile computer and you connect to the internet or other computers away from home. Also, be sure to choose Public network if you access the internet via a mobile broadband network.

Windows 7 is now connecting your computer to the network. You don't need to do anything here. Everything is automatic.
Note: If Windows 7 detects another computer on your network running Windows 7 that also has a homegroup setup, you will be prompted to choose what kinds of files you'd like to share on that homegroup and for the homegroup password. You can Enter this information or Skip the setup entirely.

Please wait while Windows 7 is loading. Soon you will be able to see your windows desktop.

Congratulations! You successfully installed Windows 7.